Wednesday 17 December 2014

Key Frame

 
This key frame is the perfect spot to hang your keys when you come in the door so you know exactly where they are when you want to head out the door. And it looks great! 
I started with a basic frame. This one I made from old painted wood, and it is 5.5 inches by 7 inches. It's rustic looking, not perfectly square, but I like it. 
You can buy or make a similar one to fit your space. 
Line the back of the frame with your choice of paper, this is a piece of scrap booking paper that I cut to size. I glued the paper to the backing and then attached it to the frame. 
I found these antique looking keys at the craft store, I bought them a long time ago but I knew I would find a "need" for them some day. Using a hotglue gun, I attached the keys to the paper backing. 
Screw the cup hooks in to the bottom of the frame.
 Now hang this in your entryway and you are done! No more lost keys! 
~Jess

Wednesday 10 December 2014

Another Farm Table


This is the story of me building my farm table from barn wood. If you want to see the one Jess did, see her post here: Rustic Farm Table

It was great for me because Jess did all the original groundwork to learn about staining and waxing a table and had the great advice for me on this second attempt at building a table.

I think it's so neat that we're able to use the old wood from the barn that was on the farm. I'm hoping that we've made these tables strong enough that they'll be passed down for more people to enjoy.

This is a long story with lots of photos, so read on...

Wednesday 12 November 2014

Soap Making - The Recipes

Now you know Soap Making - The Basics, Adding Colour, and Adding Texture
Here we will go over Soap Making - The Recipes to get you started. 
Like I said earlier in this series, I started making soap with simple household oils, those easily found at the grocery store. When I began Soap Making I followed recipes that I found in books and online. And when I became more comfortable with the process I started to calculate my own recipes using online soap making calculators. 
Each oil has its own properties and each blend of oils in your soap will create a different bar. For example, olive oil is nourishing and gentle on the skin but it makes a soft bar of soap that takes many months to dry completely; lard makes a hard, white bar of soap that will lather well with lots of bubbles but it tends to be very drying on the skin. So a mix of these oils will craft a bar of soap that has all the properties you want, gentle on the skin with lots of bubbles! See? You can craft whatever blend you want. 
First, figure out what size of mold you have. My silicone loaf mold holds about 1 kg (35 oz) of liquid. I count all the oils and the water in this measurement, but do not include the lye. If I find a recipe that makes about 1 kg of soap, I can just follow it exactly, but rarely do I find a recipe exactly the size I need. You will find people online who make 17 kg of soap at once, or just one 4 oz. bar at a time. That's not for me! So I just cut back the recipe or expand it to suit me, keeping the proportions the same. As long as you have the same ratios, you will have the same soap in the end. 

Recipe 1
Canola Oil      340 g (12 oz)  
Coconut Oil    227 g (8 oz)    
Olive Oil         227 g (8 oz)   
Water             241 g (8.5 oz) 
Lye                 113 g (4 oz)

Recipe 2 
Lard                454 g (16 oz)
Olive Oil          227 g (8 oz)
Coconut Oil     227 g (8 oz)
Water              255 g (9 oz)
Lye                  128 g (4.5 oz)

Recipe 3 
Coconut Oil                  163 g          
Vegetable Shortening  451 g
Canola Oil                    182 g
Water                           262 g
Lye                               111 g

Recipe 4
Canola Oil           245 g 
Olive Oil              240 g
Lard                     215 g
Grape seed Oil    150 g
Water                   281 g
Lye                       111 g

Once you have mastered Soap Making - The Recipes, you can craft your own recipes.
 I use this soap calculator to create my own oil blends for soap making, and you can too, it's so easy.
 Welcome to the Soap Making Club! Good Luck!
~Jess

Monday 3 November 2014

Soap Making - Adding Texture

Now that you know Soap Making - The Basics, and Adding Colour, you can add a bit more fun to your soap by adding texture. The texture to the soap can act as a gentle exfoliant, and will make your handmade soap even more unique. 
In the past I have used rose petals, lavender buds, green tea leaves, mint leaves, coffee, and coconut to add texture to soaps. You can pretty much use anything that is safe for the skin, think food grade products, herbs, spices, or botanicals. It is important to make sure your texture additive is very dry before using it. Adding fresh flower petals or citrus rind to your soap is a likely to cause your soap to discolour, to go bad, to mold, and to ruin. Dry them completely and they would be great!
Use any recipe you like and once you reach trace you can add in your texture. 
Here I have added about 3/4 cup of dried lavender buds to my soap batch. 
Use a spoon to gently mix the texture until it looks even. For this soap I then separated it in half and made one half purple. I poured layers of purple and then white into the mold and did the swirl technique. Then I placed a lavender stalks over the top, and pushed them down just a bit. 
Here it is 24 hours later. 
 
The lavender buds add texture as well as a bit of purple colour and a nice fragrance.  
A really easy way to add texture to your soap is to top it with whatever you like. Here I added dried rose petals to the top of my pink and white swirled soap. 
For this one I added crushed dried mint leaves to the mix before separating and making half green. 
I swirled the green and white and added dried mint leaves to the top. 

Coming up next - The Recipes
~Jess


Wednesday 22 October 2014

Soap Making - Adding Colour

A bar of handmade soap is always awesome but you can add your own twist to it with colour. 
Make any recipe you like and once you achieve trace, you are ready for colour. You already know Soap Making - The Basics, so let's go!

You can add colour a few different ways. 
You can use hard white oils (lard and coconut, for example) to create a white bar of finished soap. Using olive oil can add a hint of green, canola and corn oil give a more beige kinda colour.
 Instead of using just distilled water, you could use milk, green tea, or coffee. 
And once you achieve trace you can add in colour using food grade dyes, cosmetics, micas, or pigments. 

For a simple swirled or layered look separate your soap into two halves. 

This is my Pink Lemonade soap, so I am making it half yellow and half pink. 
I added yellow food colouring and gold eye shadow to one half. The food colouring is from the grocery store and the eye shadow I found at the dollar store. 
Hard to tell in these photos but it turned out a nice yellow, with a pretty shimmer.
To the other half I added red food colouring and pink eye shadow.
Now half is yellow and half is pink. 
Pour in a thin layer of pink.
Pour yellow on top. Sorry for the blurry action shot!
Then pink again.
Then yellow, pink, yellow, until all the soap is in the mold layer by layer. 
If you want to half the result look layered just leave it as this. It will look great and you will see the distinct layers of colour when you cut the soap. 
But you can swirl it together a bit too. Use a chopstick, or a spoon handle and gently draw S shapes through the soap, or draw lines across it, or whatever you want. Don't swirl to much or the distinct colours will be lost. 
I did the lines first then did the S curves. 
I gently tapped the top with my fingers to add a texture to the top of the soap.
Here it is 24 hours later. 
Now cut into bars, you can see the layer pattern of the pink and yellow and a bit of swirl that I did. 
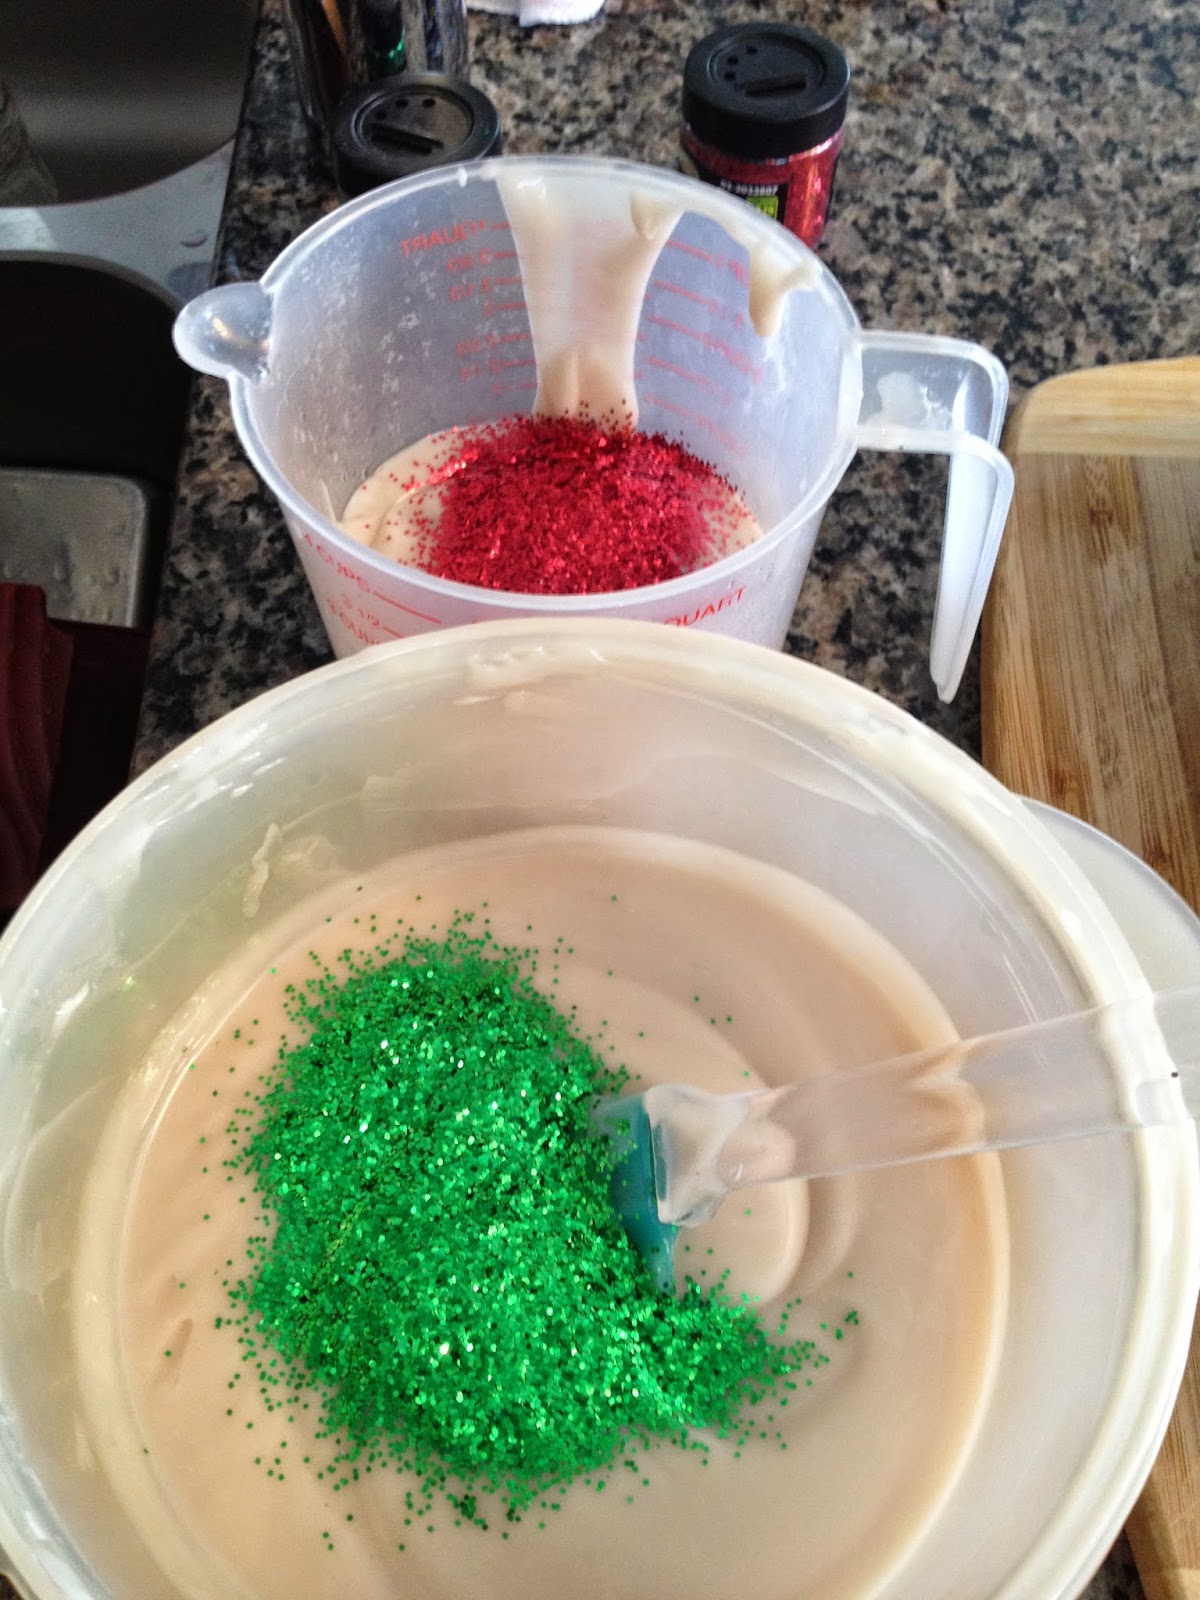
I separated this batch in half and made half green sparkle, half red sparkle. First get to thick trace, this ensures that the sparkles will stay suspended and not all sink to the bottom. 
Now add the green and red sparkles.
Layer it and gently swirl!

Another option Adding Texture
~Jess