Tuesday 10 December 2013

Microwave potato chips

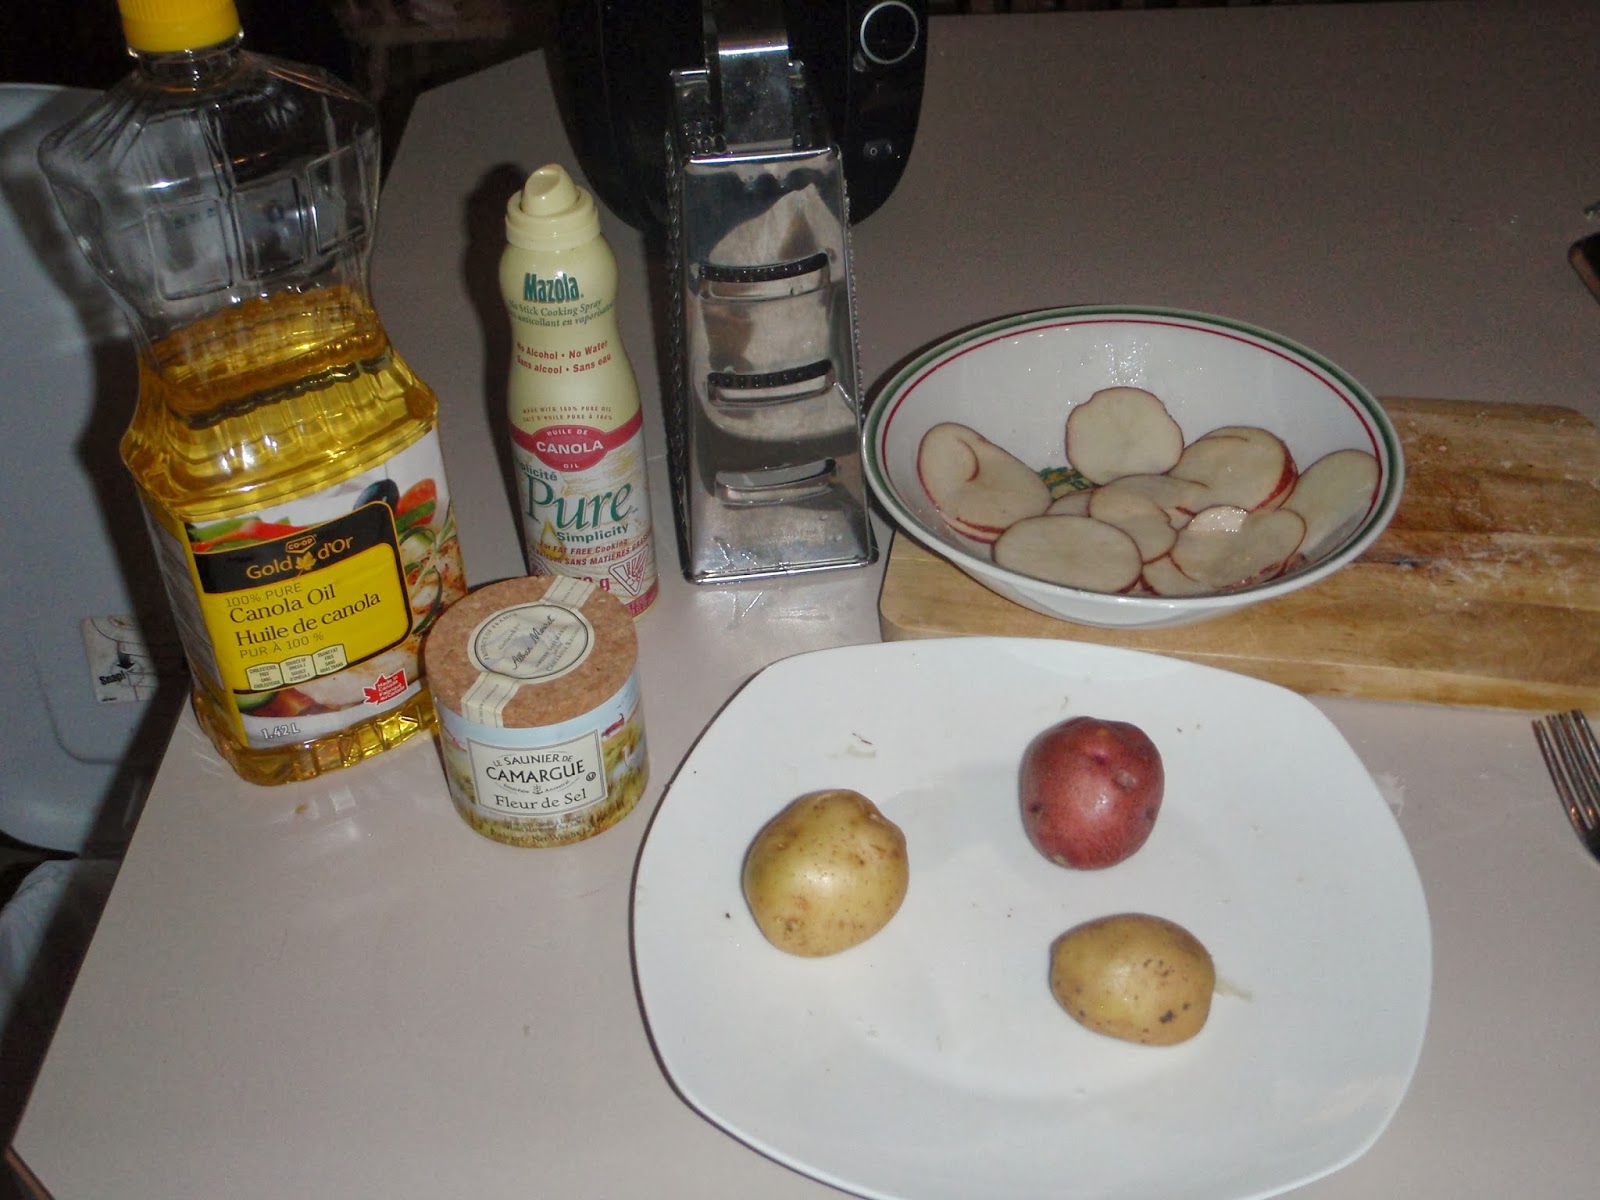
Potato chips are my snack of choice and I basically have zero willpower. I cannot have them in my house or else I can hear them calling my name from the top shelf of the pantry. It's not the potato I crave (I can leave those in the pantry until they're growing their own sprouts to make new potato friends) but deep fried and coated with some salt is delicious to me, so when I saw this on Pinterest I figured I needed to try it out because it might be a nice option to just make a few and then be done.

Courtesy of Caroyln Jung: http://www.foodgal.com/2010/01/microwave-potato-chips-really/
These instructions are copied directly from that site, so I pass on all credit to her. This is just my review of the process. 

Microwave Potato Chips
(makes 4 servings, 12-14 chips each)
1 1/3 pounds Yukon Gold or red potatoes, unpeeled, scrubbed
2 teaspoons or so of extra-virgin olive oil
1/2 teaspoon salt
Cooking spray
Slice potatoes into 1/8-inch rounds for thicker potato chips. For thinner ones, use a mandolin to cut very thin slices. Toss slices in a medium bowl with oil and salt to coat evenly.
Coat a large microwave-proof plate with cooking spray. Arrange some potato slices in a single layer on the plate. Microwave, uncovered, on High until some slices start to brown, 2 to 3 minutes (depending upon potato thickness and microwave power). Turn slices over (they will be hot, so take care with your fingers) and continue microwaving until they start to crisp and brown around the edges, about 35 seconds for very thin potato slices to 2 to 4 minutes for thicker slices. Check frequently and rearrange slices as needed to prevent scorching. Transfer chips to another plate and allow to cool completely. (They will crisp up more as they cool.) Repeat process with remaining slices.
Storage: Store in an airtight container for up to 3 days.


I started with three potatoes and tried to use the slicer side of my grater. I probably spent a dollar on that grater and this is a case of where you get what you pay for. It's fine for grating cheese, not so much for the slicing option. So I tried to slice them thinly with a knife, but they just don't end up as even. If you want to make these and you want a thin chip, definitely use a mandolin.


For the first round I did forget to spray the plate and that does seem to make a difference for some reason. It took me three plates to do all the slices I had. I thought it would be a fairly quick process, but it's totally not. It probably took 45 minutes from start to finish! By the time you slice the potatoes, coat them, microwave, flip, microwave some more, flip the ones that aren't quite done and put them back in.... And all I got was one small bowl of chips! OK, plus the few I had to try during the process. So even going slow and trying to savour each bite, it took me about 8 minutes to eat them all.


They turned out alright, though some of the thicker ones were still a little chewy. Overall, I'd say they're more like a kettle chip than a standard chip.

From the recipe I used, I'm going to say who really wants only 12 chips? If you've been eating healthy and decided to finally cave, 12 is not going to make you happy. And why would you make them to store them? One of the benefits of making them at home is that they're still a little bit warm from being cooked.

To be honest, it wasn't worth my time. It would have been faster for me to drive down to the grocery store and spend the money for some chips made by the companies that have this process nailed down. And then if I've got some willpower, I actually have some left over to enjoy another day. It's what I ended up doing anyway since I was a little disappointed in how these turned out :)

~Lisa
Thursday 28 November 2013

Quick and easy scarf

My Grandma O would have been 95 today, but she passed away about six weeks ago. So I thought I'd tell you about the scarf I made from her yarn that was gifted to me when she had to be moved out of her room at the lodge shortly before her passing. 

I got to this scarf pattern through Pinterest, so thanks for my friend for pinning it and to Jenkeng for posting the free instructions on her blog. I make no claims to this idea!
http://classycrochet.wordpress.com/2013/01/12/free-pattern-diamond-lattice-chain-crochet-infinity-scarf/

I had a few different yarns from Grandma to choose from and went with this variegated one because I thought it would be a bit fun. It definitely makes a scarf that is a more casual look and I've been wearing it with jeans and a vest. If you go with a yarn that is a solid colour and has a bit of sparkle I think you could "class it up" a notch.


My first step was to untangle the yarn I had. Most of it was still in a skein, but there was a bunch wrapped around the skein and had something sticky on it. Grandma loved peanut butter cups, so it may actually have been chocolate that she was hiding from my mom and aunts. (Grandma's classic line was "I'll be good tomorrow.") 
When I unwrapped and got rid of the sticky bits, I had several lengths of yarn, some of which were about 6 inches long all tied together. I have no idea why she bothered saving all those little pieces and I kind of felt bad throwing them out, but I didn't want to deal with all those knots in the yarn.

When I was finally ready to start, I followed the pattern as given. After starting, I thought the five-chain loops looked too big and I didn't like that it was a slip stitch to join in the loops, so I pulled that all apart. It wasn't a big deal because I wasn't too far in.


For my second attempt, I went with four-chain loops and started with a chain of 36 stitches. I also changed to a single crochet to join into the loops. I was several rows in to that scarf before I discovered that this particular size made all the variegation line up, so it was a strip down the middle of the yellow/green and all the pink/burgundy was along the edges. Ripped it apart again. The beauty of crochet that it comes undone very easily.


For the third (and final) attempt, it was a starting chain of 32 stitches and four-chain loops. Once I figured this would actually work, it was a just a matter of watching TV and crocheting! Four chain stitches and a single crochet don't take a lot of brain power. :)


I just kept going and figured I'd use up all the yarn I had. When I got to the end, I discovered it was too long for two wraps around my neck, but too short for three wraps. Argh! So I pulled several rows out again to end up with a good length for a double loop around the neck. 


I decided to do the infinity scarf (with the twist in it), though I actually have no idea why that's better than without the twist. The one thing I did get right the first time around was to make sure I ended up with the opposite pattern at each end of the scarf so that when I joined them together it would look like the pattern just continued and there was no obvious place that they joined.


The original pattern has it that you continued with the chain loops to join the two ends, but I went with more single crochet stitches so it doesn't have the final row sticking out of the pattern. 


All together it took me three evenings to make this scarf. The first night was all the trial runs I was doing, but did finally settle on my final version. I made most of it the second evening and probably would have finished it at this point if I knew it was going to end up too long anyway. I spent maybe 45 minutes on the third night to finish using up the yarn, ripping a good portion of that out since it was too long, and joining the ends together. If you're already experienced with crocheting and don't end up starting over as many times as I did, you can probably do it all in one long evening. 

Here's me wearing the scarf! 


(I have a hard time getting the camera lined up correctly for a selfie. Usually I manage to catch my forehead and the ceiling or my left ear and a bunch of wall, so it took me several tries to get the one above. It was even funnier to try and line it up for the picture to be mostly scarf.)


~Lisa


Thursday 14 November 2013

Finally, the pickles!

This is what started it all. And since we had no idea that we'd do anything with the story, we don't have pictures of the pickling process. But we had lots of fun staging the jars back on the Thanksgiving weekend, so please enjoy our artistry :)

Now, I wasn't involved in the initial conversation, so I may have to get Jess to update that part. All I know is that Mom called me asking if I wanted to make some pickled beans because Jess loves them and wants to make some. I have no doubt that the conversation likely went down a little differently from how it was presented to me, but I agreed anyway since it was getting to the end of summer I was just finishing up a couple university courses. I thought it would be a nice way just to have a chance to visit with my sister and my mom and we'd have something at the end of it all.

Well, turns out Mom doesn't really like pickled beans and didn't want to make any. However, my mom can't not help in the kitchen, so of course she was right in there. In fact, she was supposed to be sitting at the kitchen table waiting for her hair dye to process, but she's tossing out instructions to us about how to pack the jars and then HAD to unload the dishwasher at that exact moment. Yep, in the kitchen where we're trying to work, where we're moving around with hot vinegar, and with her hair dye still in. It was at this point that we all started laughing and Mom said we should start a blog because we'd have good stories. So thanks to Mom we got started!

For the pickles themselves, we did some general searches for recipes on-line and most seemed pretty similar so we kind of picked one in the middle. Lots of them suggested that you could pickle other crunchy vegetables, so we decided to throw some cauliflower and carrots into the mix. We also experimented with some having just plain pickling spice and some with chili flakes for a little kick. The beauty of something like this is that Mom has all the supplies we need, which makes it so easy to experiment with new ideas. She had the jars, the lids, the big pots, free beans and dill in the garden, even the salt and vinegar for the brine. I think all we had to buy was the carrots, cauliflower, and chili flakes.

Here's the general recipe we went with.
Brine:
- 2.5 cups vinegar
- 2 cups water
- 1/4 cup salt
Bring to a boil so that you can hot-pack your pickles and it should seal the jars. This is enough to fill two quart sealers, so we ended up having to make at least three batches of this brine to fill all the jars we had. Do NOT breathe the vapours in as it will burn your nose. I learned the hard way that hot vinegar is not a pleasant smell.

Vegetables:
- Green beans
- Yellow beans
- Carrots
- Cauliflower
Tip the beans to get rid of the stem and cut your vegetables into whatever size you'd like. Bigger pieces will take longer to pickle though, so keep that in mind. We did some jars with long beans, some as cut beans, and some with a mix of all the vegetables.

Fixin's:
- garlic cloves
- fresh dill
- pickling spice
- chili flakes

In our small pint jars:
Vegetables
1 clove garlic
1 head of dill
1 tsp pickling spice

The taller quart jars:
Vegetables
1 clove of garlic
2 heads of dill (one at the bottom of the jar, one packed on top)
1/8 tsp chili flakes

Clean the jars with hot soapy water and then rinse with hot water. Have your jar lids boiling on the stove so they are sterilized and the rubber is soft for sealing. There are lots of websites out there that can provide more specific details on canning if you need.

Put your Fixin's in the bottom of the jar, pack tightly with vegetables, pour the hot brine to 1/4 inch from the top of the jar, and put your lid on. Set them aside on the counter to cool away from any breeze, which could crack the jars. They should seal within a few hours as the hot brine cools down. We had one jar that didn't seal, so we just brought the brine to a boil again and poured it back in and it worked the second time. Then you have to let them sit for at least six weeks so they turn into pickled vegetables.

I found the beans aren't as crunchy as the cauliflower and carrots, but they're still good. The spicy version (in the taller jars) has just enough of a little kick but doesn't burn your mouth. If you like spicy, feel free to add some more chili flakes to your jar.

Enjoy!
~Lisa


Sunday 3 November 2013

Red Stamp

Crafting handmade cards is one of my favourite hobbies. But there are times when a digital card is easier to send, and makes more sense. I have been using the Red Stamp app for a while now. It is super easy to use, it has a vast collection, and it will even help you with writing the message! Try it out. Send me a Red Stamp card!

The other day was my friends' birthday, I wouldn't be able to see her on her special day but I wanted her to know I was thinking of her. Perfect time to use Red Stamp.

I texted her a beautiful card so she would know that Miss R and I send her love and good wishes for her birthday.

In looking for the perfect card for her I browsed through many of the collections. I found some very nice background images that the 'crafty girl' in me knew I could use in other ways.  I saved the images to the camera roll on my phone to use at a later date.

When the update came for iOS7 I installed it. And then regretted doing it! I know I just have to get used to it. Everything is so different and my old wallpaper didn't look as good with the new colours. Thankfully I had some saved Red Stamp images to choose from. I used one as my home screen and rotated another one 180 degrees and then set it for my lock screen. Beautiful and so easy!


~Jess

Wednesday 16 October 2013

Candle holders

Since Thanksgiving was on the way I thought I would try and get in the autumnal spirit and decorate my home. I love leaves; I love them when they are that bright yellow-green in the spring, I love them when they are that vibrate green in the summer, and I love them the most when they are that rich gold-red-green mix in the fall.

I saw this on Pinterest and thought it seemed like a simple way to dress up some basic candle holders...
http://diyreal.com/diy-stained-glass-candle-holders/
Seemed to me that if I could stick coloured tissue paper on glass candle holders, I could likely stick gorgeous fallen leaves on glass candle holders. Right?

I have about 60 candle holders leftover from my wedding in a dusty box at the farm; they would be perfect for this project! They are just simple glass candle holders from IKEA and they fit a large tea light, but any candle would work. (Sorry Dave, I mean OUR wedding).

The leaves were free for the gathering! I got a mix of greens, reds, and yellows. Turned out better to use "fresh" leaves that were still attached to the tree, as opposed to the fallen ones, more pliable and less likely to break down into a pile of dust.

I got things set up on the table in the porch, Mom was sewing a quilt top and Miss R was napping, so I thought that I could decoupage my afternoon away.

First I tried to attach the leaves to the glass with Modge Podge. Disaster! They didn't even stick for a second. I tried to let the Modge Podge dry a bit and become tacky, thinking that then it would work better. Wrong. It worked worse. Now I just had glue covered candle holders, a sticky mess. When they fully dried they looked a bit cloudy and mottled, it was a bit of a milk glass look...cool, but not the look I was going for.

Mom goes digging in her crafting stash to find a solution. She pulls out a can of spray adhesive. Now you have to understand my hesitation in using this stuff...the label was yellowed and peeling, the nozzle appeared to have melted and deformed many years ago, and there was no MSDS attached. Whatever.

I went outside to spray the adhesive on, thinking that would avoid a hazardous chemical spill in the house. It was a good idea I did! That deformed nozzle broke and sprayed glue chunks everywhere. Like, everywhere! I think it must have surprised me at just the right moment because my eyelids were glued open and my forehead was glued wrinkled. You think I'm kidding, but I'm not!
So I came back inside and tried to wash up and regroup. As a semi-experienced crafter, my trusted go-to for sticking things together is the hot glue gun. Yes, that's right; I ended up using a glue gun to adhere the leaves to the glass candle holders. Simple, right? I should have thought of it first! So simple in fact that I got a bit caught up and instead of just making 3 for me and 3 for Mom, I ended up making 21 in total. I just loved the way they look!

Once they had all been decorated I gave them a quick spray of acrylic sealer. Done and done.

They look so nice on the mantel. A little autumn decor for the home!


~Jess

Tuesday 8 October 2013

Cards Galore!

I really enjoy making cards. I used to go to card making parties that my friends were hosting and pay a few dollars for the joy of it. I would always say that I like crafting handmade cards but I don't want to have to store all the stuff - boxes of paper and stamps and ribbons. No thanks! I am a bit of a minimalist and seem to get anxiety when I see messes, and piles of things. I know I'm crazy. My sister will definitely say that her kitchen island is a source of anxiety for me. Thankfully my husband is a neat freak as well!

Anyway, it seems that more I resisted owning anything stampin' related, the more it came into my life. I hosted a party a while back and based on the sales I ended up with some hostess gift stamp sets. Then I saw on my Mommy Buy and Sell Facebook group that a lady was selling most of her vast collection of stampin stuff. I went to meet her and she was just so lovely that hearing about her cancer diagnosis and her inability to scrapbook anymore made me tear up! She said that she wanted her stuff to go to someone who crafty and kind and could make good use of it. I felt kinda honoured. Seriously, I did. She sold me a ton of stuff for a great price. So out of respect for my new friend Lori, I got into card making.

I invited some ladies over for a "Creating Cards Party", have a coffee and a visit and make some beautiful cards.

We used chalks on this one to create that soft effect. So pretty!

Lately I have been into this 'quilted' look. Just made the zig-zag seam with a marker!

A bit out of my comfort zone, this bright one. I usually make cards with a more rustic or vintage feel but I like how cheerful this one is!

This one is my favorite. I love leaves and I think it was perfect for the season.

Looking forward to a Creating Christmas Cards Party!
~Jess

P.S. I clearly need to think about the photos a little more. Spread out the raffia on the counter to decorate the fall card, but didn't consider the dishes in the sink behind it. :-(
The dishes were from the scones Jess made, which were delicious, and they would have been better with the apple butter we made except Jess forgot to take some home with her!
~Lisa

Wednesday 25 September 2013

Apple Butter (without any actual butter!)

I had access to free apples (thanks to Brenda on the library board) and Jess suggested we try making Apple Butter. A quick Google search using the imaginative key words "apple butter" and I ended up picking the first recipe that shows up as a place to start. (http://www.simplyrecipes.com/recipes/apple_butter/) Most recipes that come up seem fairly similar, but the primary reason I chose this one was that it was cooked for a couple hours on the stove instead of overnight in a crockpot. "Instant" gratification I guess.


We started with only 2 pounds of apples, so the ingredients were modified accordingly:
2 pounds of apples (free from a backyard, so I don't know what type)
1/2 cup apple cider vinegar
1 cup water

Cut off the bad spots, cut the apples into quarters, throw it all into the pot - peels, cores, and all. That's my Grandma O's old pot, by the way. It's seen a few recipes for sure!

Cover the pot, bring to a boil, then reduce heat and simmer for about 20 minutes until the apples are soft. I'm not sure of the purpose of the apple cider vinegar, though I'm guessing it's to help break down the peels and cores, but WARNING it kind of makes the kitchen stink. Then voila!, a pot of stinky, funny coloured, mushy apples. Mmmm, sounds delish...

Luckily my mom has the foodmill contraption, so it makes it really easy to turn that apple mash into apple sauce. The original recipe didn't say if you were supposed to drain off the vinegar and water that you added for cooking, so it went in too. (I'm laughing because it's funny to be photographed trying to be serious.)


It's quite an amazing machine as it does pull out all the pulp and juice and you are just left with really dry peels and seeds to throw out. The 2 pounds of apples resulted in about 2 cups of apple sauce, so based on the recipe, I added:
1 cup sugar
a dash of salt
1 teaspoon cinnamon
1/4 teaspoon allspice
grated rind and juice of 1 lemon

If you check out the original recipe I based this one, you'll notice I didn't add any ground cloves. That's because Mom didn't have any. Jeez, when you're getting all this stuff for free, you'd think she could at least supply everything you need. Apparently, allspice contains cloves, so we had some of the flavour we needed anyway.

It turns a nice dark colour and then you have to cook it some more on medium low heat.


The recipe said to stir it constantly (I did not) to prevent burning and it would take 1 to 2 hours (it did not). It probably didn't take as long because it was a really big pot and we didn't have that much sauce to start with, so it took only about 40 minutes this time. I did stir it every few minutes, but it doesn't really require constant attention. Cook until thick and to test this you smear it onto a plate chilled in the freezer.


Using that plate seemed to be rather unnecessary. We thought it looked pretty thick, so tested it out and yep, it stuck to a plate without falling off when held vertically. Really, if you've done some basic cooking, you'll probably have a good idea of when it's thick enough. We ended up with about 1.5 cups of cooked apple butter. 

It still had the apple sauce texture, so we used an immersion blender to smooth it out a bit more. I would actually recommend doing this to the apple sauce before you cook-to-reduce just so it's easier to blend.


Since it is so thick, there is no "pouring" into jars and certainly don't bother with a funnel (that just ended up a mess). It does have the texture of room-temperature butter, so it's rather a process of "smearing" into the jars. These were old sampler jars of jam, so they didn't seal and we'll just have to store them in the fridge. 


Rachel was the first taster and then we used it on the pork chops we had for dinner. It is quite good, so now I have to figure out what else to serve it with!


Monday 16 September 2013

Competition for Hallmark

These cards were made by Jess. I just had to share the picture because I thought they were so pretty!

We'll be having a card-making gathering at the end of September, but Jess made me some in the meantime because I was getting low on my stash. (I say "we" like I'm part of the planning for that event. I'm totally not, though I'll probably help with the very important aspect of choosing the snacks.)

I never got into the scrapbooking movement, but card making I enjoy. I particularly like to go to an event, enjoy some snacks and some good laughs, and then walk away with a stack of beautiful cards that I can give out. The cost works out to slightly more than the dollar store, but not as expensive as Hallmark, and you have one-of-a-kind cards to give. And thanks to Google for helping with the sentiments to write inside as I think that's the hardest part!

Lisa

Saturday 31 August 2013

It started with some pickles


The idea for a blog that is. We were in the middle of making some pickled beans and Mom HAD to empty the dishwasher at that exact moment, while she was waiting for her hair dye to process no less. In amongst the laughter at her not being able to wait, she suggested we start a blog as we'd probably have some good stories. When we started considering all the things we do, we figured we have tried most crafts and thought we just might have enough to say, so we're giving it a whirl.

Lisa (on the left): I think I've been an old lady since I was young. I like knitting (starting with several long strips of "snake blankets", as my dad called them) and crocheting and now I'm expanding to dabbling in photography, card making, and now preserving food. Hence the pickles.

Jessica: Things really got started for me while I was on maternity leave with my daughter Rachel.

The pickled beans should be ready right around Thanksgiving, so we'll give you that full story then!

Lisa and Jessica