Showing posts with label Food. Show all posts

Thursday, 27 August 2015

Muffaletta Sandwich

OK, it's WAY passed the time when I actually wrote up something. Good thing we're a team with this blog and Jess covered for me for the last few months! My only excuse/reason is that since I'm an online teacher I literally (and I mean the actual definition of "literal" here) spend every working day sitting at the computer, so I've been avoiding it over the summer.
This muffaletta sandwich was another item I saw Martha Stewart make on her "Cooking School" show and wanted to try. Luckily for me, we were having a potluck lunch at the end of the school year so my co-workers were a captive audience!

Here is the inspiration recipe, though if you compare you'll see I made my own modifications due to 1) not being able to get the special Italian meats and 2) not wanting to bother making my own olive salad.
Ingredients:
1 large sourdough loaf
75 grams Cervelat Salami
75 grams Hot Genoa Salami
75 grams Hot Capocollo
150 grams Hot Mortadella
150 grams provolone cheese
2 cups arugula
1 500-mL jar roasted red peppers (used half)
1 500-mL jar spicy olive bruschetta (used 3/4)

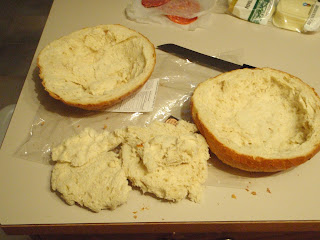
Hollow out the bread so you have space for everything else. I ended up using these insides with artichoke dip later, but it would also be good to dry out and make bread crumbs with.
First put down some of the olive mix (so it can soak into the bread) and then just layer the meats, cheese, arugula, peppers, and more of the olive mix.
Last thing on the top should be the olives again.
It's maybe a little difficult to see in my pictures, but you get quite a mound of "stuff" above the bottom half of the bread.
Put the top on, wrap in plastic, and squish with a heavy pot overnight in the fridge.
The next day it's nice and flat and is easily transported in it's plastic wrap.
Cut into wedges to serve.
Since this was part of potluck lunch, it was a bit difficult to cut into small wedges (I think I tried cutting it into 12) as the layers did start to slide apart a bit, but if it's your main dish, you can quite easily cut into 8 wedges to serve.

My overall comments would be that these particular meats and the spicy olive mix made this quite SPICY! Lots of ladies fanning their faces. So judge your audience :-) Easy enough to buy the mild versions of the meats and/or not use spicy olives. I also found that this particular olive mix maybe had a bit too much oil in it, so I would probably drain some out next time. It just ended up soaking the bread too much for me.

But I think the people at work liked it! (Does this count as a photo bomb?)
~Lisa

Monday, 18 May 2015

Granola Bars

This recipe for granola bars is a favorite of our family. It makes about 30 bars, that keep well on the counter or in the fridge for at least a week, and you can freeze them for months.

Made from basic ingredients that you probably already have in your pantry, they are a bit sweet, a bit salty, and all yummy. Easy for a quick breakfast on the go, to pack in lunches, or for an afternoon snack. Try these out and you will not buy granola bars again!
This recipe is VERY flexible, it calls for 3 cups of oats, and 3 cups of other stuff. That other stuff could be anything you like! Peanuts, almonds, cashews, walnuts, coconuts, raisins, dried cranberries, dried apricots, pumpkin seeds, sunflower seeds, flax, bran, chocolate chips, whatever! 
My go to mix is 2 cups trail mix and 1 cup shredded coconut.
Just a note - if you use chocolate chips, they tend to melt when you pour the hot syrup on so you get a chocolate peanut butter swirl thing going on, yummy but the chips melt in together. If you want them to stay as whole chips add them at the end, once you have spread the mixture in the pan just sprinkle them on top and gently push them down.
Then you make a syrup, but it is pretty flexible too. It's just made of nut butter, sugar, butter, milk, and a bit of vanilla. I usually use peanut butter, but you could use almond butter, cashew butter, or even nut-free peanut butter substitute. I have made it with white sugar, brown sugar, and agave, but any sugar substitute would probably work. And any milk too, dairy or dairy-free. Butter or margarine, or probably even a coconut oil or other fat.
In a medium saucepan, mix the syrup ingredients together and slowly heat to a boil.
It is important to go slow with the heat or you might scorch the milk and burn the sugar...like say if your toddler has to use the bathroom and you get pulled away from the stove to go help her, well,  you may come back and find some dark spots in the syrup, that's the burnt bits, but whatever, whisk them in and if they are small you won't even tell in the end...
Just keep whisking!
Boil this for about 5-7 minutes. The longer you boil it, the firmer your bars will be in the end. If you want them to stay soft and chewy, boil 5 minutes. If you want them firm and drier, boil 7 minutes. Take some time to properly lick all the spoons...
Remove the syrup from the heat and add in the vanilla. Whisk this is, it may froth up a bit as the alcohol burns off, don't be alarmed!
Then carefully pour this molten syrup over the dry ingredients, remember this is boiling hot syrup so be careful! Mix it all together, and put it into a pan. I use a 9 x 13 jelly roll pan, it is just a cookie sheet with sides, but use whatever you have.
Smooth it all out and pack it down.
Once it is cool, cut into bars and enjoy!

Granola Bars

3 cups oats
3 cups other stuff (nuts, seeds, dried fruit)

1/2 cup butter
1 cup peanut butter
1 cup sugar
1/2 cup milk
1 tsp vanilla

Mix dry ingredients in a bowl.
In a saucepan heat syrup ingredients. Boil for 5-7 minutes.
Remove from heat, add in vanilla.
Pour syrup over dry ingredients. Mix well.
Smooth into pan and let cool.
Cut into bars and enjoy!

~Jess

Friday, 24 April 2015

Soda Cupcakes

I saw this recipe in an Oprah Magazine and wanted to try it out. When we were having a group lunch at work, I thought it would be a great opportunity to make them because a) I don't need a dozen cupcakes for myself and b) I would have some "guinea pigs" to give me some feedback on what they thought of it.

I just took a picture of the recipe, so I don't know what exact issue of Oprah Magazine it was in, but since I took the picture on February 17, 2014 (yes, it took me this long to try it), my best guess is either the January 2014 or February 2014 issue.

The copied recipe:
Combine 1 box any flavor cake mix with 1 can room-temperature soda in any flavor. (We're partial to chocolate mix and Coca-Cola.) Whisk until smooth. Pour batter into a lined muffin tin. Bake for 18 minutes at 350 degrees until a toothpick emerges clean. Let cool completely, then top with whipped cream. Makes 12 cupcakes.
I had a box of lemon mix in the pantry and figured gingerale would be a good pairing, so I went with that for this first attempt. I didn't have any cans of gingerale, so used just half of a 710 ml bottle.

The pop does fizz quite a bit when you pour it in (I didn't take any pictures of that), but otherwise it looks like normal cake batter when it's all mixed together. I filled the cups about 3/4 of the way and ended up with 18 cupcakes.
Some still came up over the top of the paper cups, so if I would have tried to fit all the batter into only 12 it would have been a terrible mess in my oven.
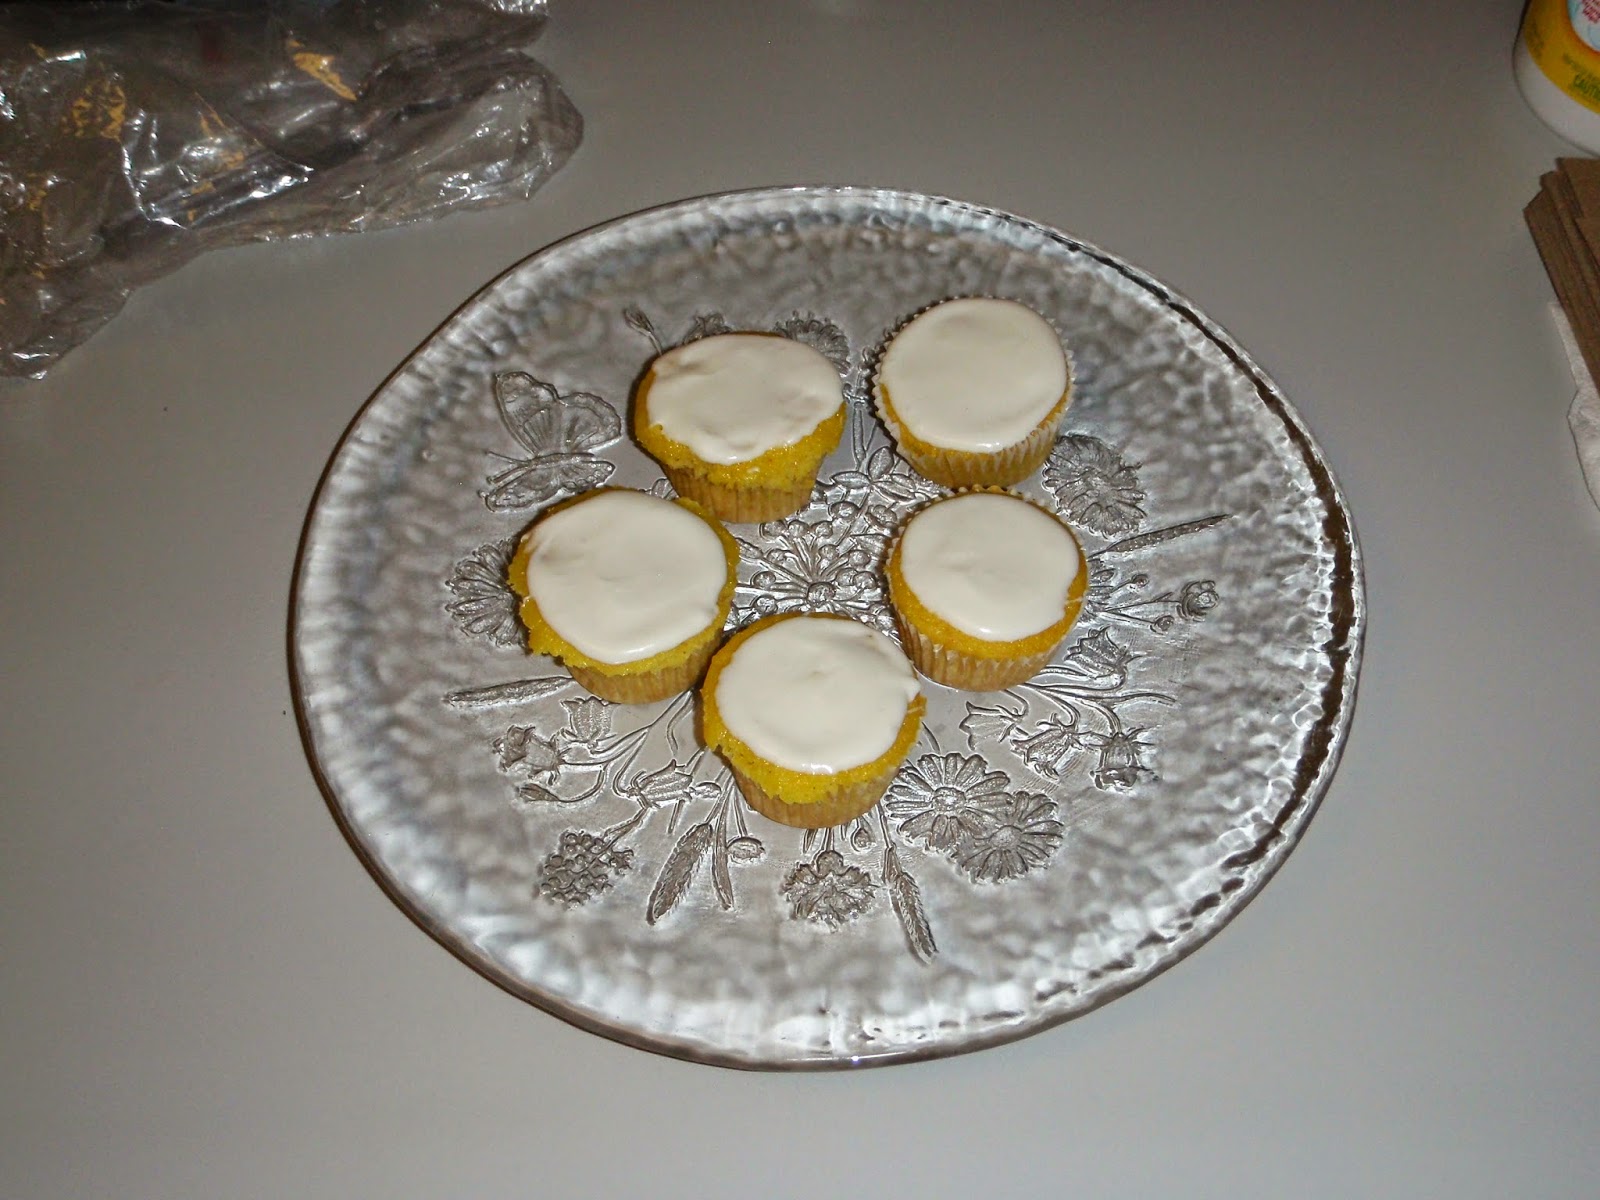
At 18 minutes they weren't quite ready, so I probably ended up baking them for 22 minutes before the toothpick was clean. When they're all done, they still look like "normal" cupcakes, so the picture doesn't really show that much other than what you'd expect. What you do notice is that they are very moist. So if you're going to do any fancy decorating, I'd recommend that you leave them out for a bit to dry so you have a firmer surface on the top of the cupcake to work on.
I went with a cream cheese icing, using the recipe from Kraft as a guideline.
1 brick softened cream cheese (though I bought the Co-op brand since it was cheaper than Kraft)
1 tbsp. milk
1 tsp. vanilla
3 cups icing sugar

Let's be honest, I never measured any of that. I used a splash of milk, a glitch of vanilla, and enough icing sugar until it looked thick enough. Be prepared though because this makes a lot of icing. If you don't have a plan for using all the icing right away, it will store for quite some time because of the high sugar content. I'm not qualified to make any recommendations about how long that is, but I will say that I have kept it in my fridge for a month with no ill effects :)

These cupcakes did turn out quite well, so maybe I will try the chocolate-coke combination next time!
~Lisa


Wednesday, 25 February 2015

Valentine's Dream Cookies

These are called Dream Cookies because they do taste like some kind of delicious sweet dream. They are better than sugar cookies with the addition of custard powder. I made them in hearts for Valentine's Day but of course any shape will do.
Gather all the ingredients and mix, don't let the mess of a two-year-old make you too crazy!
I separated the dough into a few sections just to make working with it a bit easier. Keep the other sections on the fridge until you are ready for them.
Roll out to about 1/4" thickness. Cut out your cookies.
On to the sheet pan and into the oven.
They come out looking golden and beautiful!
Now, the original recipe from my Mom says to sandwich them together with jam in the middle, which is delicious and likely something you have on hand, but for our Valentine's party I made a strawberry buttercream frosting.
Just make a regular buttercream and add a couple tablespoons of jam. So yummy and nice colour for the party. Spoon it into a bag and cut off one corner if you don't have a piping bag.
Now the assembly line can begin! I topped a few with more buttercream just to use it all up.
And Miss R helped me with a few...
Perfect treat for the Valentine's Party!

Dream Cookies

1 c       butter or margarine
3/4 c    sugar
1          egg
2 c       flour
1 tsp    baking powder
2 Tbsp Birds Eye Custard Powder

Cream together softened butter and sugar.
Add in the egg.
Add dry ingredients.
Mix completely.
Roll to about 1/4 inch thick.
Cut out cookies.
Bake at 350 degrees for 10 min.
Makes about 48 cookies, so will be 24 when sandwiched together.

Enjoy!
~Jess

Thursday, 19 February 2015

Raspberry Sticky Buns

This is another of those random finds that I thought I should try out. I think a friend first shared the link on Facebook, which I then tracked down the website and added it to my Pinterest boards. Not my original idea for making these buns, but this is my take on the experience.
http://www.aspicyperspective.com/2014/03/raspberry-sticky-buns.html

Very few ingredients required since I started with the pre-made bread dough. This was how it was written in the recipe and I thought I'd give it a try because I'd never used frozen dough before.
- 2 loaves frozen bread dough
- 10 bag frozen raspberries
- 8 oz cream cheese (or mascarpone)*
- 6 tbsp sugar, divided
- zest of 2 lemons, divided
- 1 tbsp cornstarch
- 1 tsp vanilla extract
- 1 cup powdered sugar
- 1/4 cup whipping cream

*There is a note on the original post that cream cheese puffs into a creamy layer filling the swirls, while the mascarpone cheese absorbs into the dough, leaving spaces but making a moist texture. I used cream cheese and haven't tried with mascarpone yet.

1) Place the frozen loaves in the fridge and let them thaw overnight. In the morning, set them on a plate, cover with plastic wrap, and let rise 2-3 hours. When ready, press the loaves together and roll the dough out on a well-floured surface, into a 12" x 24" rectangle.
(I was baking these at night so they'd be ready to go the next morning. So I started the process mid-morning figuring that "overnight" equates to about 8 hours. And the frozen dough is a pretty good deal - I think I paid $6 for 5 loaves.)

2) In a small bowl, mix together the cream cheese, half the lemon zest, 3 tbsp sugar, and vanilla. (I did this in with my ancient Sunbeam mixer so it would be well mixed.) Smear this mixture over the dough, leaving 1 inch  border on the long ends.
3) In a separate bowl, stir together the frozen raspberries, remaining 3 tbsp sugar, cornstarch, and pinch of salt. Sprinkle the raspberry mix over top the cheese spread. (I didn't use the cornstarch or salt in this step because I didn't have any cornstarch and usually I think the salt is unnecessary. I had extra sugar in the bowl that didn't stick to the raspberries, so I sprinkled that over too. And I forgot to take a picture.)

4) Roll the dough into a log, then use a serrated knife to log the log into 15 equal rolls. Place the rolls in a parchment lined 9" x 13" pan and allow them to rise 30-45 minutes. (The didn't seem to get too much bigger for me during the rise. I had the two extra little ends, so that's why I have an extra pan here.)
5) Preheat the oven to 400 degrees F. Bake for 30-35 minutes until the tops are golden. Allow the rolls to cool for 5 minutes in the pan, then lift out by the edges of the parchment paper.
6) Whisk together the powdered sugar, remaining lemon zest, and whipping cream. Drizzle or brush over the tops of the sticky buns.
7) Enjoy!
They were quite good. The one main change I'd make is to be sure to tuck in any raspberries that are falling out the bottom of the roll when you put them in the pan because when the baked any raspberry touching the parchment paper burned a little.

When I see these recipes, they usually serve a lot of people, so I always want to try and feed a group since I don't need to eat 15 sticky buns on my own. So I made them for our staff PD Day and they were great for the breakfast before the meetings started.
Then there were leftovers, so they went with me to the farm the next day for a tea party.
In this picture you can see homemade jam (link here), the candle holder decoration (see here), and clotted cream (which is so delicious and I'll have to get Jess to write about since she's the one that makes it).
~Lisa