Tuesday, 10 December 2013

Microwave potato chips

Potato chips are my snack of choice and I basically have zero willpower. I cannot have them in my house or else I can hear them calling my name from the top shelf of the pantry. It's not the potato I crave (I can leave those in the pantry until they're growing their own sprouts to make new potato friends) but deep fried and coated with some salt is delicious to me, so when I saw this on Pinterest I figured I needed to try it out because it might be a nice option to just make a few and then be done.

Courtesy of Caroyln Jung: http://www.foodgal.com/2010/01/microwave-potato-chips-really/
These instructions are copied directly from that site, so I pass on all credit to her. This is just my review of the process. 

Microwave Potato Chips
(makes 4 servings, 12-14 chips each)
1 1/3 pounds Yukon Gold or red potatoes, unpeeled, scrubbed
2 teaspoons or so of extra-virgin olive oil
1/2 teaspoon salt
Cooking spray
Slice potatoes into 1/8-inch rounds for thicker potato chips. For thinner ones, use a mandolin to cut very thin slices. Toss slices in a medium bowl with oil and salt to coat evenly.
Coat a large microwave-proof plate with cooking spray. Arrange some potato slices in a single layer on the plate. Microwave, uncovered, on High until some slices start to brown, 2 to 3 minutes (depending upon potato thickness and microwave power). Turn slices over (they will be hot, so take care with your fingers) and continue microwaving until they start to crisp and brown around the edges, about 35 seconds for very thin potato slices to 2 to 4 minutes for thicker slices. Check frequently and rearrange slices as needed to prevent scorching. Transfer chips to another plate and allow to cool completely. (They will crisp up more as they cool.) Repeat process with remaining slices.
Storage: Store in an airtight container for up to 3 days.


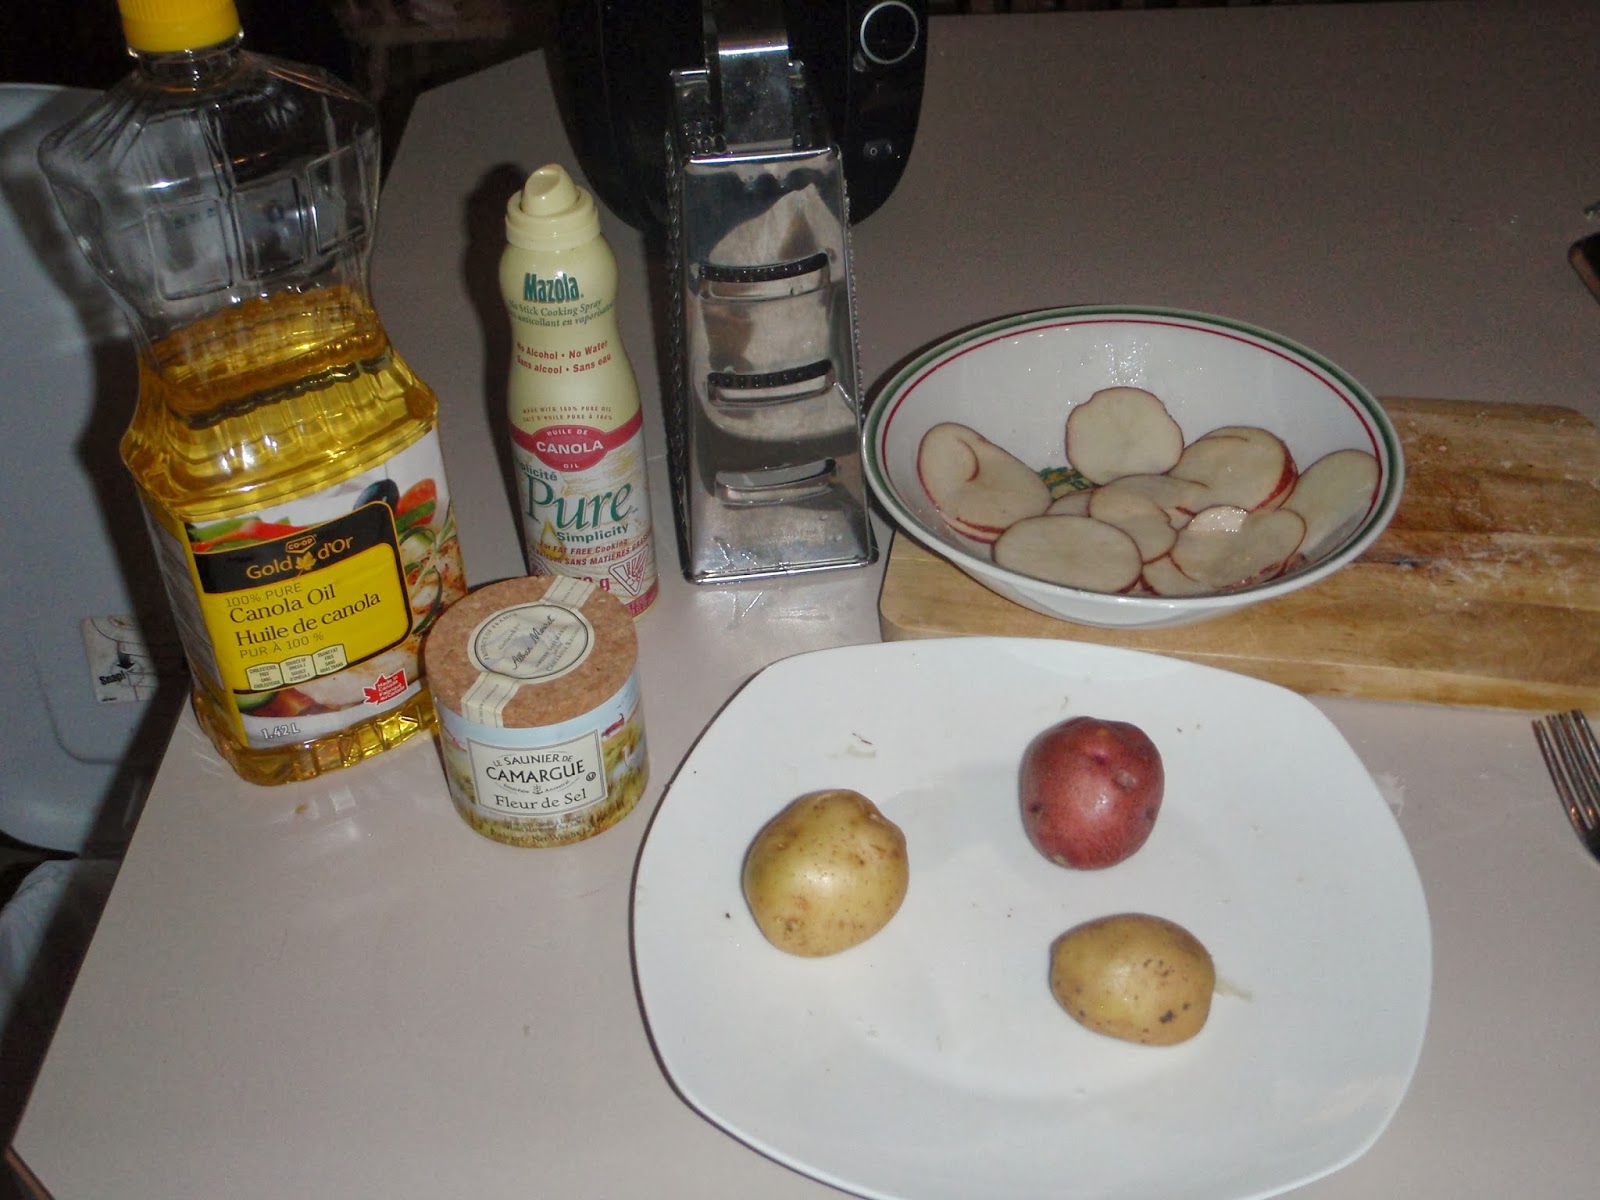
I started with three potatoes and tried to use the slicer side of my grater. I probably spent a dollar on that grater and this is a case of where you get what you pay for. It's fine for grating cheese, not so much for the slicing option. So I tried to slice them thinly with a knife, but they just don't end up as even. If you want to make these and you want a thin chip, definitely use a mandolin.


For the first round I did forget to spray the plate and that does seem to make a difference for some reason. It took me three plates to do all the slices I had. I thought it would be a fairly quick process, but it's totally not. It probably took 45 minutes from start to finish! By the time you slice the potatoes, coat them, microwave, flip, microwave some more, flip the ones that aren't quite done and put them back in.... And all I got was one small bowl of chips! OK, plus the few I had to try during the process. So even going slow and trying to savour each bite, it took me about 8 minutes to eat them all.


They turned out alright, though some of the thicker ones were still a little chewy. Overall, I'd say they're more like a kettle chip than a standard chip.

From the recipe I used, I'm going to say who really wants only 12 chips? If you've been eating healthy and decided to finally cave, 12 is not going to make you happy. And why would you make them to store them? One of the benefits of making them at home is that they're still a little bit warm from being cooked.

To be honest, it wasn't worth my time. It would have been faster for me to drive down to the grocery store and spend the money for some chips made by the companies that have this process nailed down. And then if I've got some willpower, I actually have some left over to enjoy another day. It's what I ended up doing anyway since I was a little disappointed in how these turned out :)

~Lisa

Thursday, 28 November 2013

Quick and easy scarf

My Grandma O would have been 95 today, but she passed away about six weeks ago. So I thought I'd tell you about the scarf I made from her yarn that was gifted to me when she had to be moved out of her room at the lodge shortly before her passing. 

I got to this scarf pattern through Pinterest, so thanks for my friend for pinning it and to Jenkeng for posting the free instructions on her blog. I make no claims to this idea!
http://classycrochet.wordpress.com/2013/01/12/free-pattern-diamond-lattice-chain-crochet-infinity-scarf/

I had a few different yarns from Grandma to choose from and went with this variegated one because I thought it would be a bit fun. It definitely makes a scarf that is a more casual look and I've been wearing it with jeans and a vest. If you go with a yarn that is a solid colour and has a bit of sparkle I think you could "class it up" a notch.


My first step was to untangle the yarn I had. Most of it was still in a skein, but there was a bunch wrapped around the skein and had something sticky on it. Grandma loved peanut butter cups, so it may actually have been chocolate that she was hiding from my mom and aunts. (Grandma's classic line was "I'll be good tomorrow.") 
When I unwrapped and got rid of the sticky bits, I had several lengths of yarn, some of which were about 6 inches long all tied together. I have no idea why she bothered saving all those little pieces and I kind of felt bad throwing them out, but I didn't want to deal with all those knots in the yarn.

When I was finally ready to start, I followed the pattern as given. After starting, I thought the five-chain loops looked too big and I didn't like that it was a slip stitch to join in the loops, so I pulled that all apart. It wasn't a big deal because I wasn't too far in.


For my second attempt, I went with four-chain loops and started with a chain of 36 stitches. I also changed to a single crochet to join into the loops. I was several rows in to that scarf before I discovered that this particular size made all the variegation line up, so it was a strip down the middle of the yellow/green and all the pink/burgundy was along the edges. Ripped it apart again. The beauty of crochet that it comes undone very easily.


For the third (and final) attempt, it was a starting chain of 32 stitches and four-chain loops. Once I figured this would actually work, it was a just a matter of watching TV and crocheting! Four chain stitches and a single crochet don't take a lot of brain power. :)


I just kept going and figured I'd use up all the yarn I had. When I got to the end, I discovered it was too long for two wraps around my neck, but too short for three wraps. Argh! So I pulled several rows out again to end up with a good length for a double loop around the neck. 


I decided to do the infinity scarf (with the twist in it), though I actually have no idea why that's better than without the twist. The one thing I did get right the first time around was to make sure I ended up with the opposite pattern at each end of the scarf so that when I joined them together it would look like the pattern just continued and there was no obvious place that they joined.


The original pattern has it that you continued with the chain loops to join the two ends, but I went with more single crochet stitches so it doesn't have the final row sticking out of the pattern. 


All together it took me three evenings to make this scarf. The first night was all the trial runs I was doing, but did finally settle on my final version. I made most of it the second evening and probably would have finished it at this point if I knew it was going to end up too long anyway. I spent maybe 45 minutes on the third night to finish using up the yarn, ripping a good portion of that out since it was too long, and joining the ends together. If you're already experienced with crocheting and don't end up starting over as many times as I did, you can probably do it all in one long evening. 

Here's me wearing the scarf! 


(I have a hard time getting the camera lined up correctly for a selfie. Usually I manage to catch my forehead and the ceiling or my left ear and a bunch of wall, so it took me several tries to get the one above. It was even funnier to try and line it up for the picture to be mostly scarf.)


~Lisa